
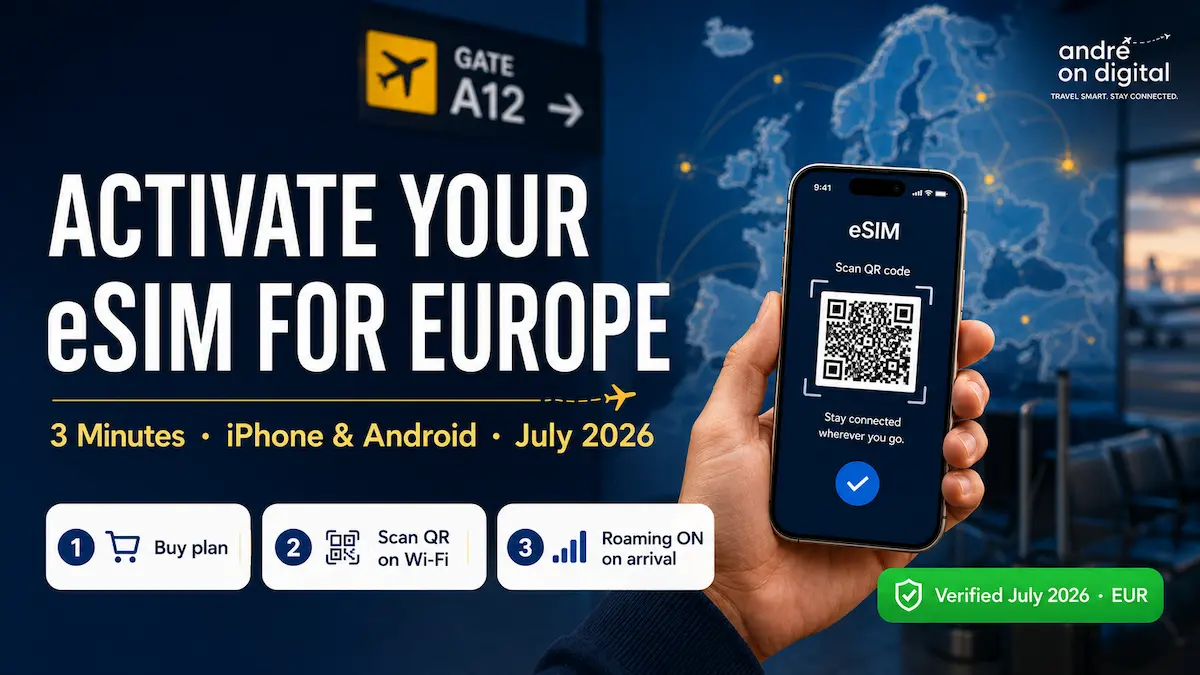
The first time I tried to activate an eSIM for Europe, I panicked. The QR code appeared, my phone asked for settings I didn’t understand, and I wasn’t sure if it was working.
Turns out it’s dead simple — the whole process takes about 3 minutes, and the profile download itself takes 10–30 seconds. Once you’ve done it once, you’ll never stress about it again.
This guide walks you through activating an eSIM for Europe on iPhone and Android, step by step — and then goes where no generic tutorial does: the exact activation rules of nine providers (when the validity clock really starts, official APN values, what never to delete), verified on each provider’s official pages in July 2026.
Whether you’re using Nomad, Holafly, Airalo, Saily, Ubigi, Jetpac, Yesim, Maya Mobile or GigSky, the finger-work is nearly identical — the rules around it are not. And a note for readers heading beyond Europe: these steps work identically for any destination — eSIM activation is device-based, not country-based.
⚡ Quick Answer: Activate Your eSIM in 3 Steps
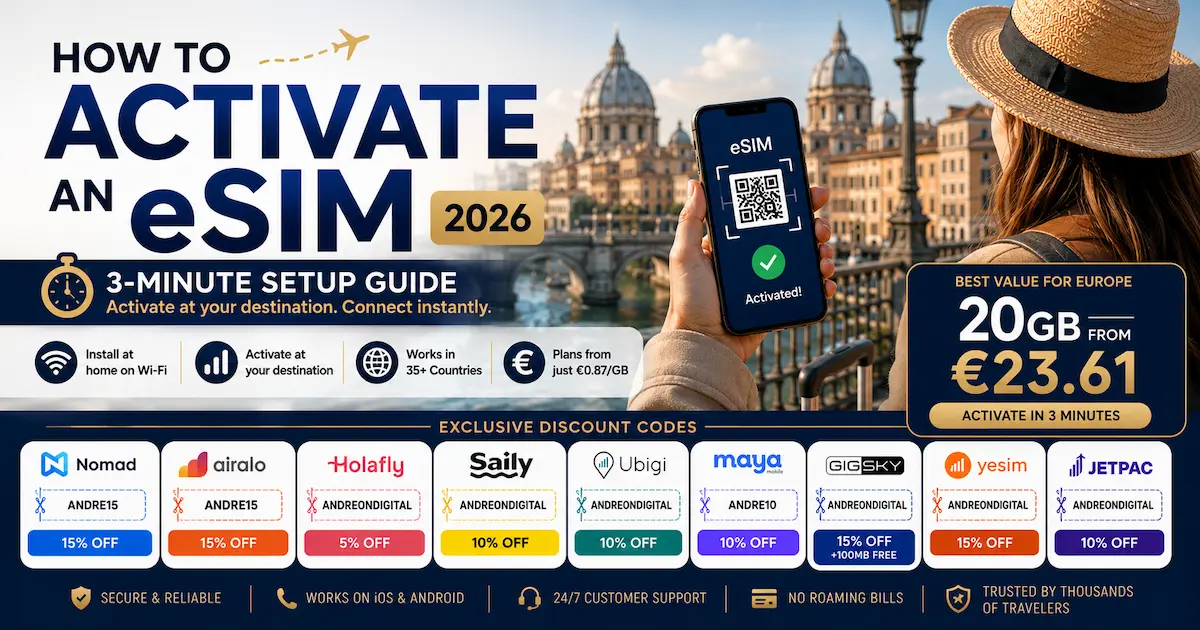
- Buy an eSIM plan from a provider like Nomad, Holafly, or Airalo — keep the email with the QR code.
- Install at home on Wi-Fi: scan the QR code in Settings (Cellular on iPhone, SIMs / SIM Manager on Android). Download takes 10–30 seconds.
- At your destination: turn the eSIM on, set it as your data line, and enable Data Roaming for it (off on your home SIM).
⏱️ Total: about 3 minutes. Install at home — not at the airport, not on the plane. Installing and activating are two separate events — the section below explains why that distinction saves you money.
What You Need Before Activating an eSIM
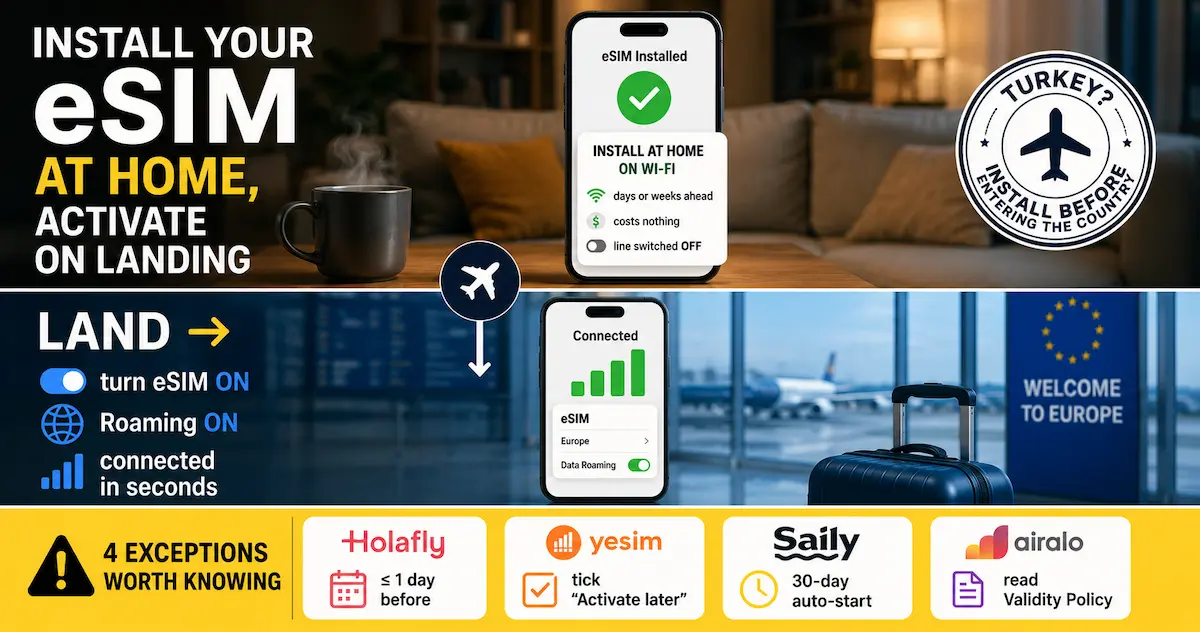
Do this at home, on Wi-Fi, before your trip. Not at the airport. Not on the plane. At home.
1 Check your phone is eSIM compatible. Go to Settings → About Phone → look for “EID” (a long number). If it’s there, your phone supports eSIM.
Most iPhones from XS (2018) onward and most Android flagships from 2020 onward work — but check that your regional variant is compatible too (some models sold in certain markets ship without eSIM). For a full list, see my eSIM Compatible Phones guide .
2Make sure your phone is unlocked. A carrier-locked phone may block eSIM profiles from other providers. On iPhone: Settings → General → About → Carrier Lock should say “No SIM restrictions.” On Android: contact your carrier or try inserting a different SIM to verify. Learn more about dual SIM setups in my eSIM vs Physical SIM guide.
3Connect to stable Wi-Fi. You need internet to download the eSIM profile. Hotel Wi-Fi, home Wi-Fi, café — anything stable. Don’t start the installation on a weak connection: an interrupted profile download is the most avoidable eSIM failure there is.
4Buy your eSIM plan. Choose a provider and purchase your Europe plan. You’ll receive a QR code by email or inside the provider’s app. Don’t scan it yet — just have it ready. Before buying early, check your provider’s row in the Activation Matrix below — a few plans start their clock at purchase or installation.
5Keep your confirmation email accessible. You’ll need the QR code and possibly the SM-DP+ address, activation code or confirmation code. Many QR codes are single-use — have the email open on another device or printed, and never delete an installed profile to “start over.”
→ Don’t have an eSIM yet? See my Top 7 eSIM Providers for Europe ranking.
How to Activate eSIM for Europe on iPhone (Step-by-Step)
To activate eSIM for Europe on iPhone, complete the profile download on reliable Wi-Fi first, then choose the travel line for cellular data.
Works for iPhone XS, XR, 11, 12, 13, 14, 15, 16 and newer.
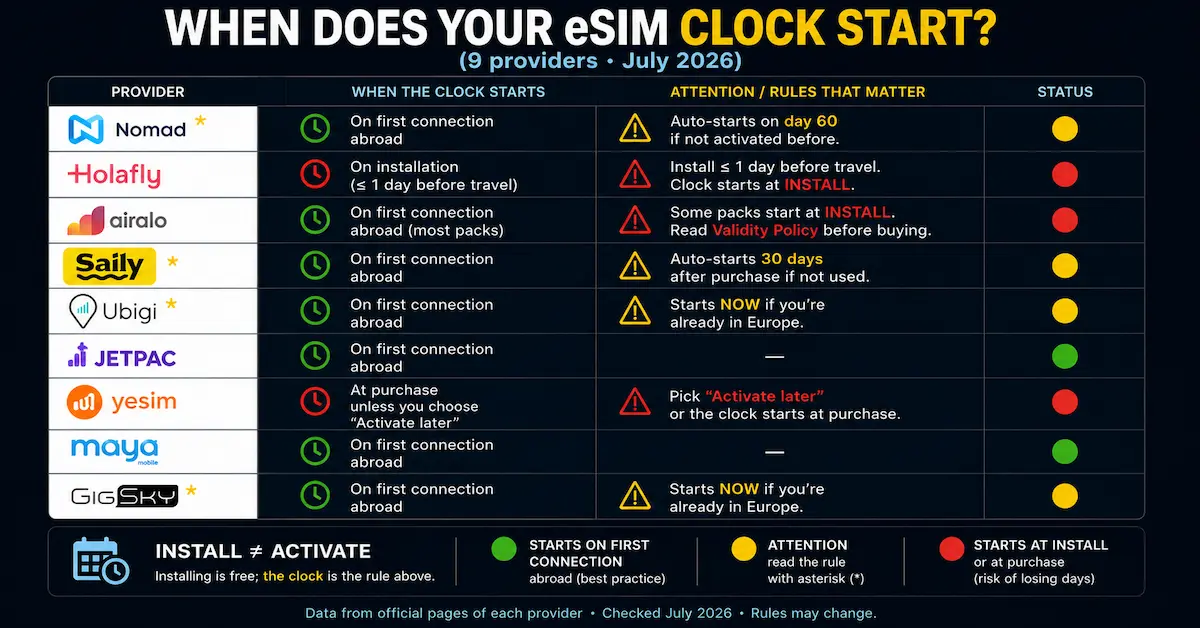
Step 1: Go to Settings → Cellular (or Mobile Data in some regions).
Step 2: Tap Add eSIM or Add Cellular Plan. Apple’s setup process varies slightly by iOS version.
Apple documents the same Settings → Cellular → Add eSIM route in its official iPhone eSIM setup guide, which is useful when menu wording changes after an iOS update.
Step 3: Tap Use QR Code and scan the QR code from your provider (displayed in their app or sent by email). On iOS 17.4+, you can also press and hold a QR code shown on the same screen to add it directly.
If you can’t scan, tap Enter Details Manually and type the SM-DP+ address and activation code — leave the confirmation code blank unless your provider gave you one.
Step 4: Your iPhone downloads the eSIM profile. This takes 10–30 seconds. Don’t interrupt it.
Step 5: When prompted, label your new eSIM — name it something clear like “Europe Travel” or “Nomad” so you can identify it later.
Step 6: Set your new eSIM as the Cellular Data line. Go to Settings → Cellular → Cellular Data → select your travel eSIM. Then turn OFF Allow Cellular Data Switching — this stops your phone from silently falling back to your home carrier’s expensive roaming when the eSIM signal dips.
Step 7: Turn on Data Roaming for the travel eSIM. Settings → Cellular → tap your travel eSIM → toggle Data Roaming ON. This is the step most people forget — without it, your eSIM won’t connect to European networks.
Step 8: Turn off Data Roaming on your home SIM to avoid carrier charges. Settings → Cellular → tap your home SIM → toggle Data Roaming OFF. Your home line stays available for calls, iMessage and bank SMS.
That’s it. When you land in Europe, your phone connects to a local carrier automatically — Orange in France, Deutsche Telekom in Germany, Cosmote in Greece, depending on your provider.
How to Activate eSIM for Europe on Android (Step-by-Step)
To activate eSIM for Europe on Android or Samsung, use SIM Manager, select the travel profile for mobile data, and enable roaming only on that line.
Works for Samsung Galaxy S20+, S21, S22, S23, S24, S25, Google Pixel 3+, OnePlus, Xiaomi, and most 2020+ flagships. Menu names vary slightly by brand.
Step 1: Go to Settings → Network & Internet → SIMs (Samsung: Settings → Connections → SIM Manager).
Step 2: Tap Add eSIM or Download SIM (Samsung: Add eSIM).
Step 3: Tap Scan QR code and point your camera at the QR code from your provider. If you saved the QR code as an image, some Android phones let you select it from your gallery. Manual option: choose Enter Activation Code and paste the SM-DP+ details.
Step 4: Your phone downloads the eSIM profile. Wait 10–30 seconds without leaving the screen.
Step 5: When prompted, name your eSIM (e.g., “Europe Data”) and set it as your mobile data SIM.
Step 6: Enable Data Roaming for your travel eSIM. Settings → Network & Internet → SIMs → tap your travel eSIM → toggle Roaming ON. Also turn off automatic data switching if your phone offers it.
Step 7: Disable Data Roaming on your home SIM to prevent charges.
Step 8: Some Android phones require setting the APN (Access Point Name) manually. Most providers configure this automatically, but if your data doesn’t connect after landing, use only your provider’s official value — the Activation Matrix below lists them — and never copy another provider’s APN.
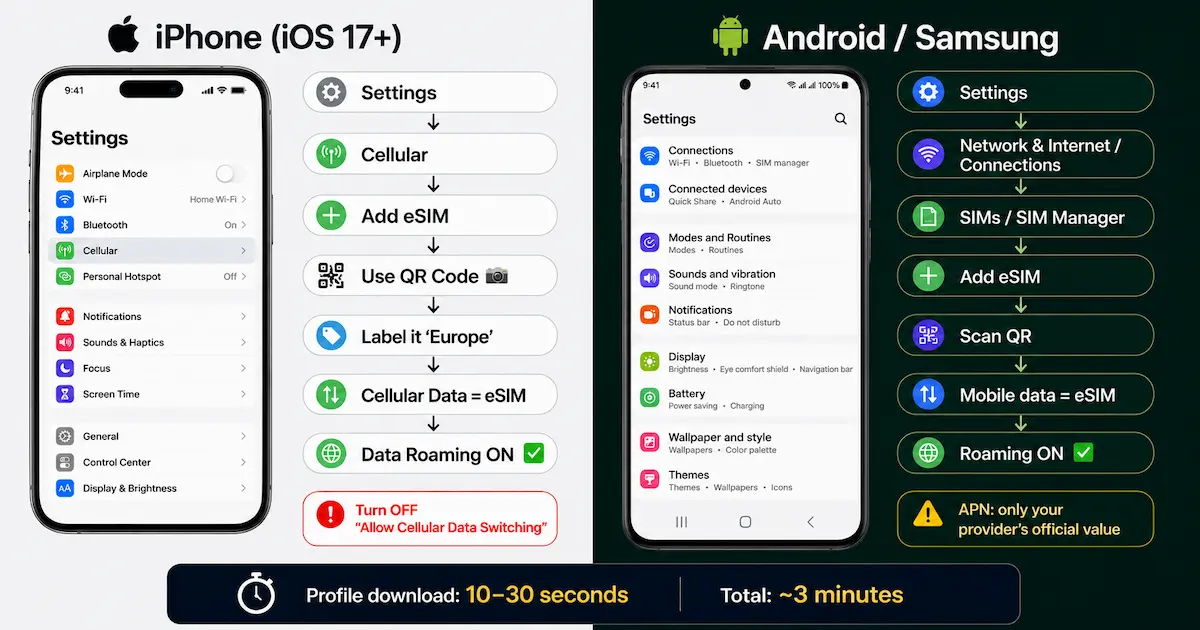
The Activation Matrix: When Your Clock Really Starts (9 Providers, July 2026)
This is the table no generic tutorial gives you — each provider’s official installation timing, validity trigger and APN policy, read from their own help centers on July 23, 2026. “Activation” can mean enabling the line, connecting to a network, or starting the validity countdown; the provider’s definition is the one that applies to your plan.
| Provider | When to install | When the paid clock starts | APN / key warning |
|---|---|---|---|
| Nomad | Before travel (buy ~1–2 weeks ahead) | On a supported network at the destination; unused eSIMs generally auto-activate on day 60 | Varies by upstream provider — check the app/email. Thailand plans are a special case: install only after landing |
| Holafly | A few hours before travel; regional/global: no earlier than 1 day before | Normally on connection at the destination; some scenarios can auto-activate | Preconfigured; manual value: Global. Profile stays tied to the first phone |
| Airalo | On Wi-Fi, after reading the package’s Validity Policy | Usually on first connection in the coverage area; some packages start at installation | Package-specific — use the exact value in the app. Deleted eSIMs normally can’t be reinstalled |
| Saily | Before travel, with the Saily app installed | Automatically at the destination or 30 days after purchase, whichever comes first | Automatic; on Android keep the app open up to 5 minutes if the APN is missing |
| Ubigi | Before travel, via QR or app | On arrival in a covered area; immediately if you’re already inside it | Official APN: mbb. Keep the profile installed for future top-ups |
| Jetpac | Before travel — keep the line switched OFF until arrival | On connection to an allowed overseas network; packs must be activated within 3 months | Country-specific (e.g. mobile, internet, globaldata) — use your dashboard |
| Yesim | Before travel (fast in-app, QR or manual) | Can start at purchase unless you select Activate later (deferred up to 12 months) | Preconfigured; keep network selection on Automatic |
| Maya Mobile | Before travel; choose the start date at checkout | On the activation date you selected when buying | Normally automatic — don’t change it unless the email/support says so |
| GigSky | Ideally 1–2 days before travel, on Wi-Fi | May start during setup if you’re already in a covered area; up to 1 year to set up | App flow needs no APN; QR-code flow uses gigsky |
mbb in a Nomad profile connects nothing. When in doubt, your plan’s installation email outranks every general guide, including this one.Provider-by-Provider: Exact Activation Steps & Quirks
Same finger-work, different rules. Here’s each provider’s official flow in one compact block — the app path, the QR path, and the single quirk most likely to trip you up.
App path: open your purchased plan → Add eSIM to Your Phone . QR path: Settings → Cellular → Add eSIM → Use QR Code (iPhone can also pick a saved QR from Photos).
At the destination: turn the line on, select it for data, enable roaming, restart the phone. The quirk: most plans start on first connection abroad, but unused eSIMs generally auto-activate on day 60 — so buy 1–2 weeks ahead, not months.
Some plans have an Activate Now button in the app; your installation email says which. Add-ons chain onto an active plan with no reinstall — the smoothest mid-trip extension in the category. Full review: Nomad eSIM Review .
How Nomad eSIM Setup Looks in Practice
The Nomad video below makes the app and QR-code process easier to recognize before you start, especially if this is your first travel eSIM.
Use the video together with your own Nomad installation email, because the activation timing and APN can vary by plan.
App path (iOS 17.4+/Android 10+): Holafly app → My eSIMs → Install eSIM — fully automatic. QR path: Settings → Cellular → Add eSIM → Use QR Code (on iOS 17.4+ you can press-and-hold the on-screen QR).
The quirk — and it’s the big one: Holafly’s official guidance for regional and global plans is to install no earlier than one day before departure , because activation can occur automatically. Don’t install your Europe Holafly three weeks out. Manual APN if ever needed: Global .
The profile stays tied to the first phone — no transfers. Unlimited data with 1GB/day hotspot and Always On (1GB free monthly, for life). Full review: Holafly Review 2026 .
How Holafly eSIM Setup Looks in Practice
This video shows the Holafly installation flow and the settings you should recognize before switching the travel line on.
Remember that Holafly regional and global plans should not be installed too early, so follow the timing shown in your purchase instructions.
App path: My eSIMs → View details → Install or share → Start installation — the app walks you through every screen, which is why I recommend it to first-timers. QR/manual paths work as standard.
At the destination the app even shows package-specific connection settings under Connect to a network → How to connect .
The quirk: before installing, open Package details and read the Validity Policy — most Eurolink packages start on first connection in Europe, but some Airalo packages start at installation , even outside the coverage area. And never delete an Airalo profile: reinstallation normally isn’t possible.
APN is package-specific and shown in the app when needed. Full review: Airalo Review 2026 .
How Airalo eSIM Setup Looks in Practice
The Airalo walkthrough below shows how the app guides you through installation and where to find the plan-specific connection instructions.
Before installing, open the package Validity Policy because some Airalo plans start on connection while others may start at installation.
App-first by design: you can buy on the website, but installation runs through the Saily app — tap Install eSIM , confirm, accept the system handoff, done. The plan then activates automatically at the destination when the line and roaming are on.
The quirks: plans also auto-activate 30 days after purchase even if you haven’t flown — don’t buy months early — and an activated plan can’t be paused.
Android bonus: if the APN doesn’t appear, just keep the Saily app open in the foreground for up to 5 minutes and it configures itself. Fixed plans tether with no hotspot limits. Full review: Saily eSIM Review .
How Saily eSIM Setup Looks in Practice
This video shows Saily’s app-led installation and the automatic setup flow used on compatible iPhone and Android devices.
Keep the Saily app installed during the trip, especially on Android, because it can help complete missing APN configuration automatically.
Two purchase routes: website (QR code by email, then link your account via Sign up) or app (installs directly from the dashboard, no QR).
Validity starts on arrival in a covered area — or immediately if you’re already inside it , so don’t install a Europe plan while sitting in Europe unless you mean now.
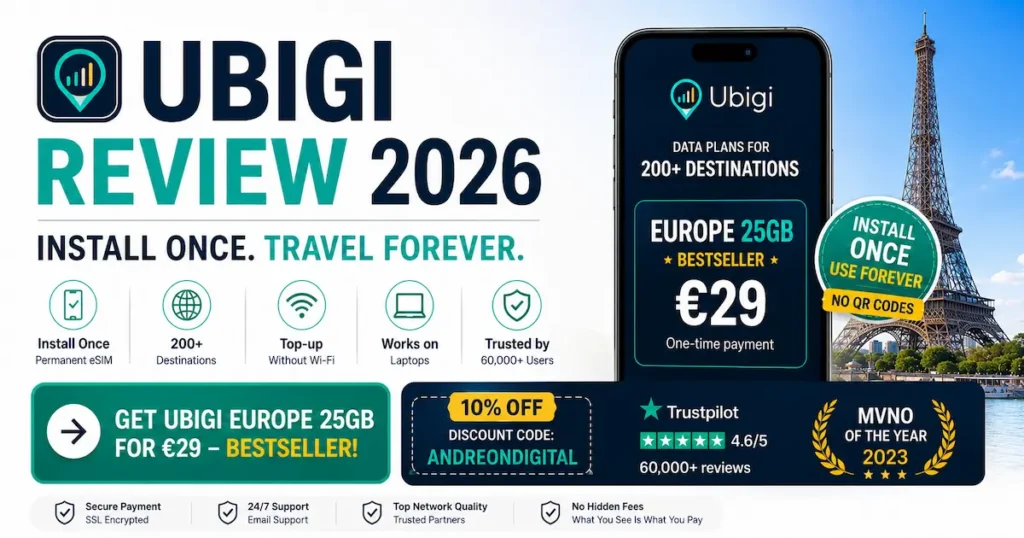
The quirk worth loving: Ubigi’s profile is reusable — keep it installed after the trip, buy a new plan next time, no new QR. Official APN when manual setup is needed: mbb (iPhone: enter it in Cellular Data, LTE, MMS and Hotspot fields).
The €24 annual plan (2GB/month × 12) is the sleeper deal for frequent EU hoppers. Full review: Ubigi Review 2026 .
How Ubigi eSIM Setup Looks in Practice
The Ubigi video below shows the profile installation and helps explain why the same eSIM profile can stay on your phone for future trips.
After your trip, switch the Ubigi line off instead of deleting it, then add a new data plan to the same profile next time.
Three paths: fast in-app installation (eSIM page → Install eSIM — don’t interrupt the handoff), QR code from the “Your eSIM profile from Yesim” email, or manual entry.
The quirk that costs money if missed: at checkout, select Activate later for any future trip — without it, Yesim says the plan’s duration may start at purchase. Deferred activation keeps for up to 12 months.
Profiles come preconfigured (no APN work) and connection can take 5–10 minutes on first activation — wait before troubleshooting. At €2.20 for a 30-day 1GB, it’s the cheapest way in Europe to keep a spare data line alive.
How Yesim eSIM Setup Looks in Practice
This Yesim walkthrough shows the available installation flow and the settings used to prepare the line before travel.
The important step happens at checkout: choose Activate later when the trip is in the future so the plan does not begin too soon.
The flow: download the Jetpac Global app, sign in with your purchase login, assign packs to your eSIM on the Home screen, install via app or QR — then keep the line switched OFF until you land .
The pack activates on connection to an allowed overseas network and packs stay valid 3 months after purchase.
The quirks: leaving the line on before travel can activate it early if it finds an eligible network; and the APN is country-specific (values like mobile , internet , globaldata ) — always use your dashboard’s value.
On 3GB+ packs, WhatsApp, Uber, Grab and Google Maps keep working free even after your data runs out — a genuine safety net. July promos are deep (30GB at 54% off).
How Jetpac eSIM Setup Looks in Practice
The Jetpac video below shows how to install the profile and prepare the data pack inside the Jetpac Global app.
Keep the Jetpac line switched off before departure and use the APN shown in your own dashboard when manual configuration is required.
Maya Mobile does activation differently from everyone: you choose the start date at checkout , and data begins on that date no matter when you install — the cleanest model for trips booked far ahead. Install early, relax. Don’t touch the APN unless your activation email says so.
(Maya currently displays USD pricing only.) GigSky is app-first with no QR and no APN in the standard flow — My Plans → Install eSIM → follow the handoff — and gives you up to a year to set up.
Its two quirks: setup while already inside a covered area can start the clock, and its QR/support flow uses APN gigsky .
Right now it also offers a free 500MB Europe trial (7 days, no card) — the zero-risk way to watch an eSIM activate before you trust one with a real trip.
Read the full Maya Mobile Review 2026 , or see current codes for both on my eSIM Discount Codes page .
Maya Mobile eSIM Video: Scheduled Activation
This video shows Maya Mobile’s installation flow and helps explain its different activation model, where you choose the plan start date during checkout.
Because the start date is selected in advance, you can install the profile early without relying on first-network-connection timing.
GigSky eSIM Video: App Installation and Trial Setup
The GigSky walkthrough below shows the app-based installation used for regional plans and the free Europe trial when it is available.
Install on stable Wi-Fi and remember that setup inside a covered area can start the plan, so check the timing before completing activation.
Troubleshooting: Common eSIM Problems (Safe Order of Checks)
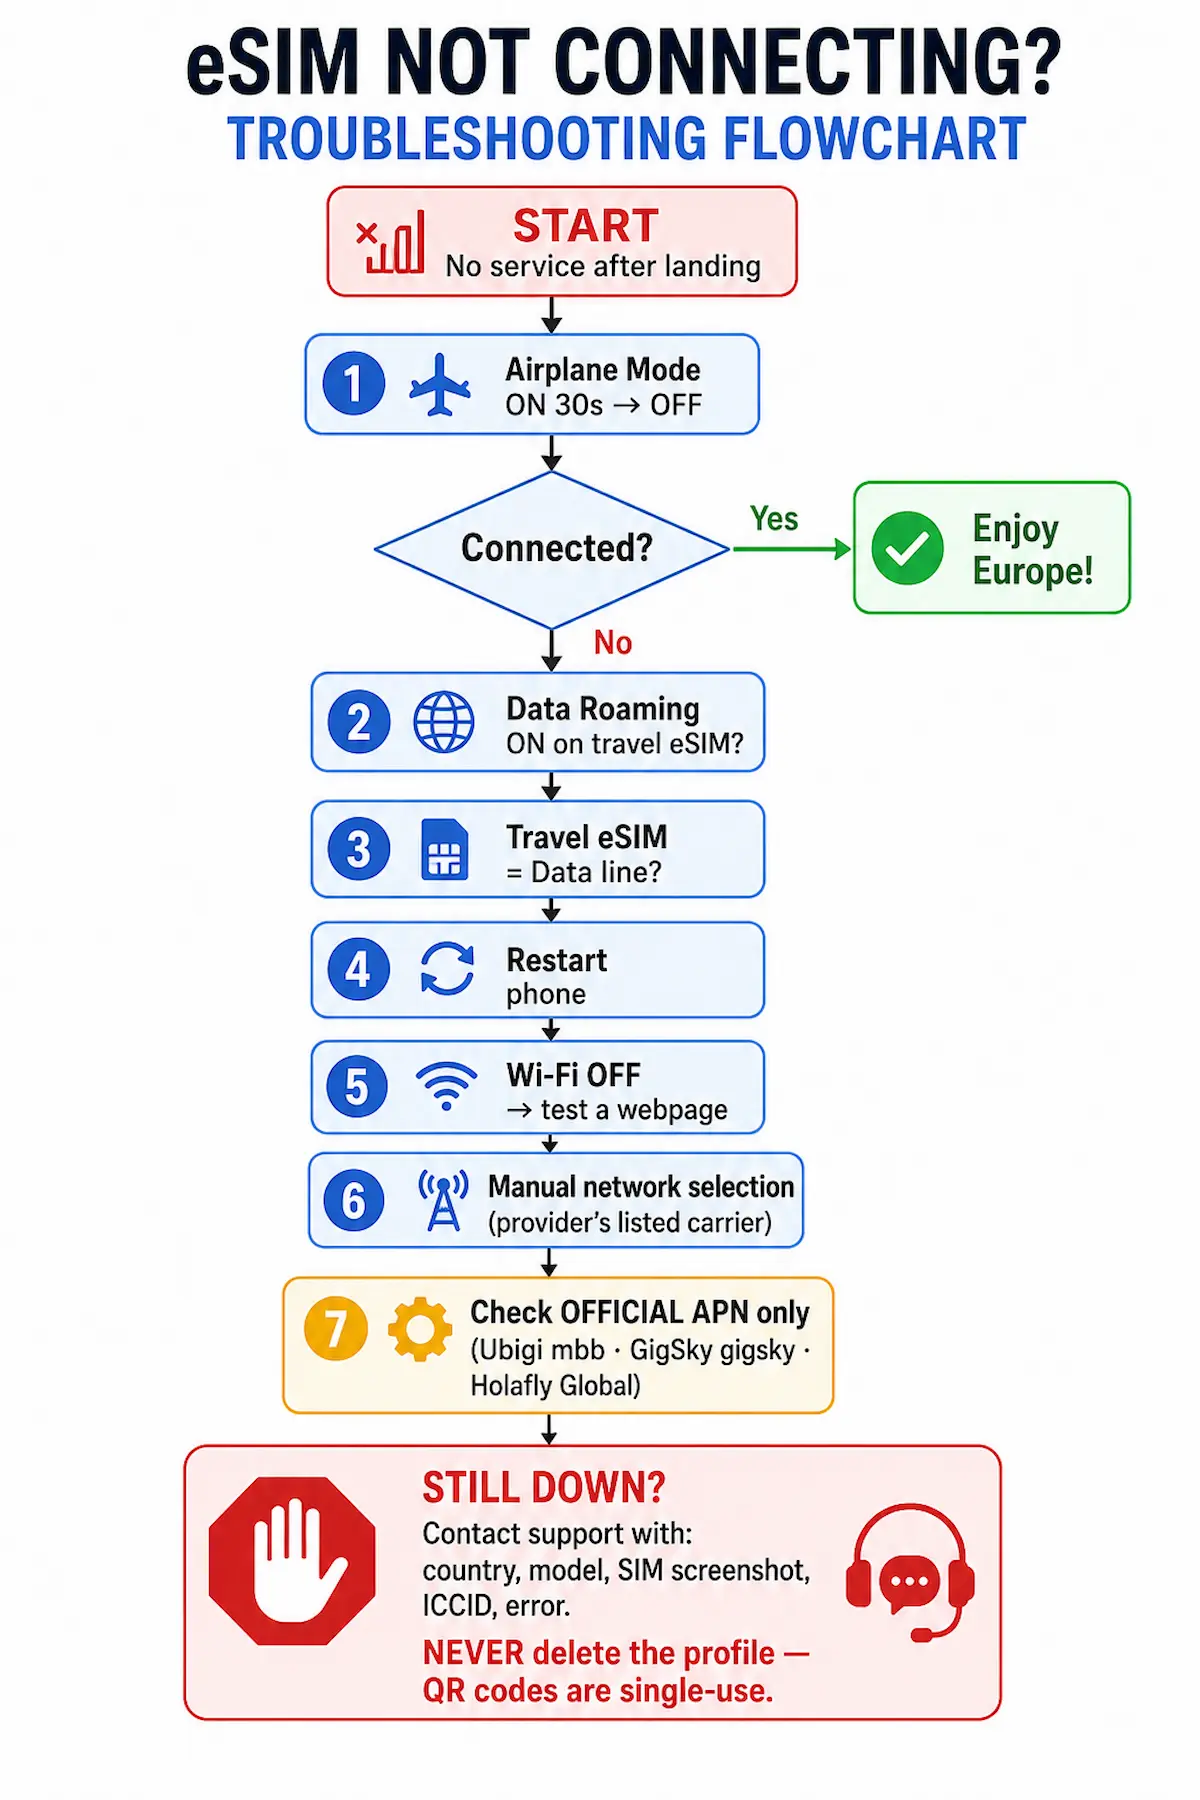
After you activate eSIM for Europe, a brief network-registration delay can be normal; work through the checks below in order before contacting support.
Run the checks in this exact order — it’s the sequence the providers’ own help centers converge on, and it fixes the vast majority of cases without touching the nuclear options.
| Symptom | Most likely cause | Fix |
|---|---|---|
| “No service” after landing | Roaming off, or phone clinging to no network | Toggle Airplane Mode on, wait 30 seconds, toggle off. Then Settings → Cellular/SIMs → travel eSIM → Data Roaming ON. This fixes most connection issues |
| Roaming is on but no internet | Wrong data line selected | Set the travel eSIM as the Cellular/Mobile Data line (iPhone: Settings → Cellular → Cellular Data; Android: Settings → SIMs). Turn Wi-Fi off and test a webpage |
| QR code won’t scan | Weak Wi-Fi or dim screen | Confirm Wi-Fi, raise the brightness on the device showing the QR, or use the manual SM-DP+ / activation code every provider includes |
| “eSIM cannot be added” | Carrier-locked phone | Request an unlock from your home carrier (instant to 1–3 business days). Check: iPhone Settings → General → About → “No SIM restrictions” |
| Connected but very slow | Weak partner network selected | Settings → Network Selection → turn off Automatic → choose your provider’s listed network (e.g. Telekom in Germany, Orange in France, Cosmote in Greece). More: Fix Slow eSIM Internet in Europe |
| Data dies mid-trip, bill appears | Phone silently switched to home SIM | Turn OFF Allow Cellular Data Switching (iPhone) / automatic data switching (Android), and keep home-SIM roaming off |
| APN missing (Android) | Profile didn’t push settings | Saily: keep the app open up to 5 minutes. Others: enter only your provider’s official APN from the matrix above, save, restart |
| Used the QR on the wrong device | Single-use code consumed | Don’t retry — contact support for a new code. Holafly and Airalo run 24/7 chat |
Can You Activate an eSIM Before Arriving in Europe?
Install before — activate there. Install your eSIM profile at home on Wi-Fi, days before your trip.
The profile sits on your phone without using data or costing anything, and for most providers the plan timer starts when the eSIM first connects to a European network — not when you install .
Installing before you travel means you land in Europe already connected: no scrambling for airport Wi-Fi, no SIM shop queues, no wasted first hour.
The exceptions are the rows flagged in the Activation Matrix. Holafly regional and global plans should be installed no earlier than one day before departure. Yesim requires Activate later at checkout, or the clock may start at purchase.
Saily auto-activates 30 days after purchase, while unused Nomad eSIMs auto-activate on day 60. Some Airalo packages start at installation, and GigSky or Ubigi may start immediately when setup occurs inside the coverage area.
Going to Turkey? Local registration rules mean activation must happen before you enter the country — see Best eSIM for Turkey.
FAQ — Activating an eSIM for Europe
Ready to Activate? Get Your eSIM First
If you haven’t chosen a provider yet, here are the top picks with July 2026 Europe prices — for the full comparison, see my Top 7 eSIM Providers for Europe ranking and the Cheapest eSIM for Europe breakdown.
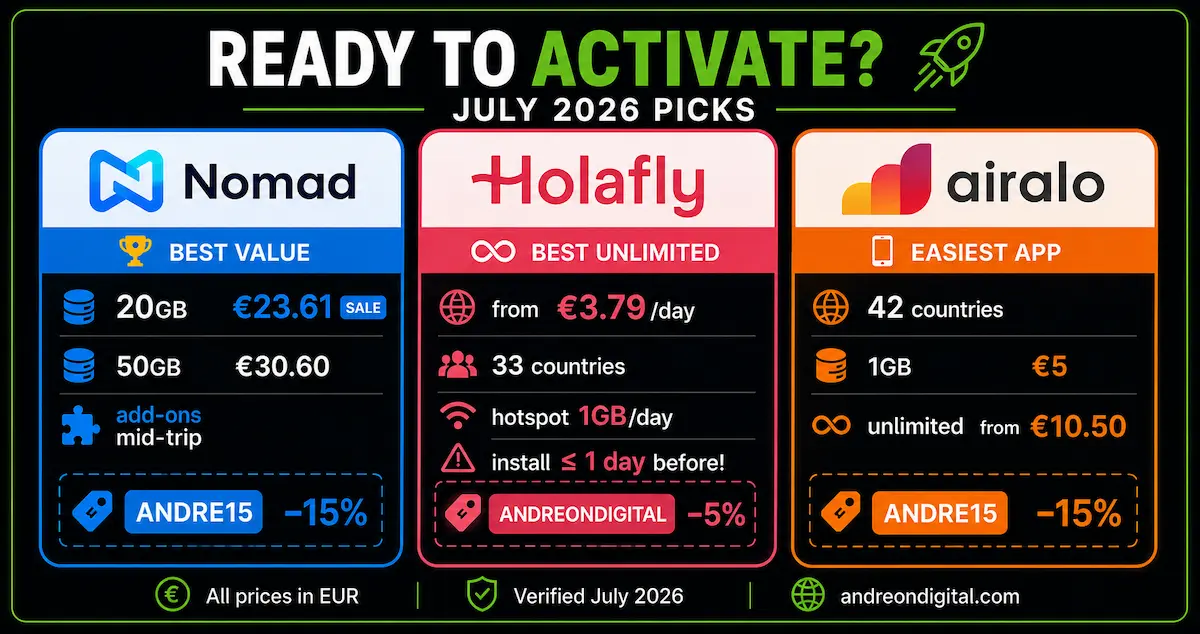
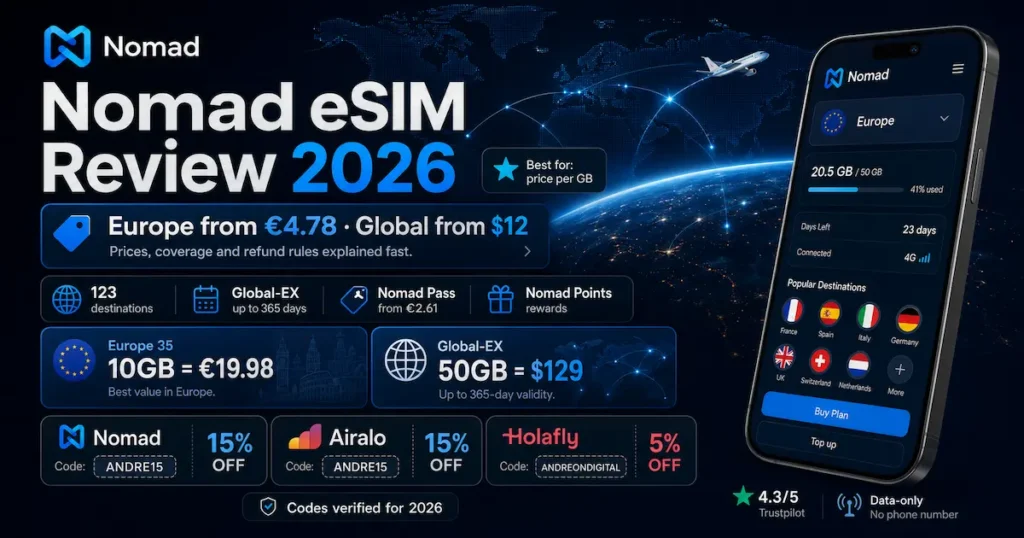
Best value: Nomad — 10GB €20.11, 20GB €23.61 and 50GB €30.60 on sale across 35+ European countries, hotspot on every plan, and add-ons that extend mid-trip without reinstalling.
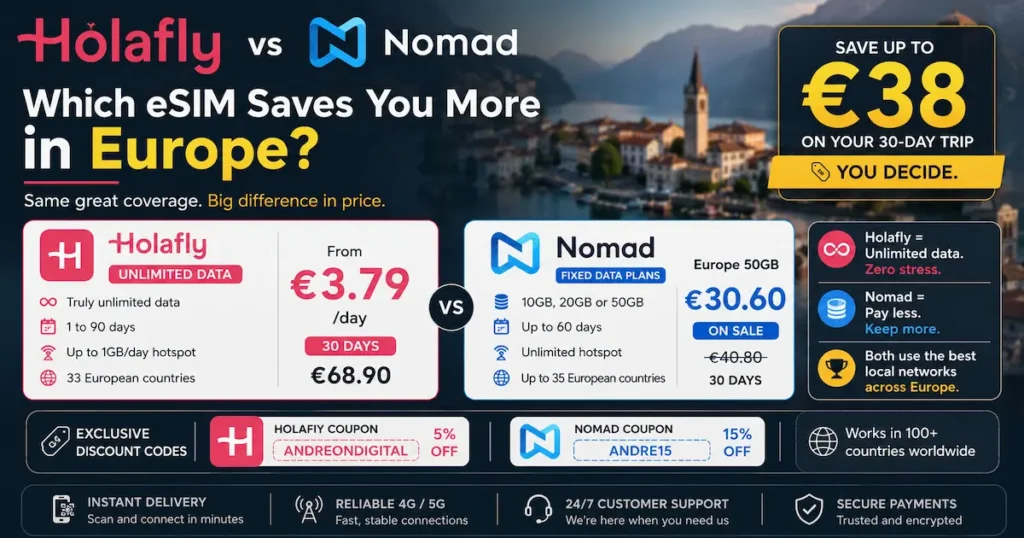
Best unlimited: Holafly — from €3.79/day (5 days €18.50, 30 days €68.90), 33 countries, hotspot 1GB/day, Always On included. Remember its rule: install no earlier than one day before departure.
Best app for first-timers: Airalo — Eurolink covers 42 countries (the widest here), 1GB from €5, unlimited from €10.50/3 days, and the app walks you through every activation step.
This article contains affiliate links — if you buy through them I may earn a commission at no extra cost to you; it keeps guides like this updated and never changes the instructions.
All prices in euros (€), read from each provider’s official Europe page on July 23, 2026 (promotional prices shown where the provider displays them; Maya Mobile currently lists USD only); prices may change without notice — always confirm at checkout.
Activation policies, APN values and installation flows summarized here were verified against each provider’s own official help pages in July 2026 and can change with app and OS updates; your plan’s installation email always takes priority over any general guide.
Menu names vary by manufacturer, region and OS version. I have personally installed and used Holafly, Nomad and Airalo eSIMs on iPhone and Android; Saily, Ubigi, Jetpac, Yesim, Maya Mobile and GigSky flows are based on their official documentation.
Last verified: July 2026
Keep Reading
eSIM Setup & Info
- eSIM Compatible Phones for Europe 2026
- eSIM vs Physical SIM for Europe
- eSIM vs Pocket WiFi for Europe
- How Much Data Do You Need for Europe?
- How to Use eSIM in Europe 2026 (day-to-day guide)
- eSIM Not Working in Europe? 9 Fixes
- Fix Slow eSIM Internet in Europe
- How to switch eSIM providers mid-trip
- eSIM Discount Codes 2026
eSIM Guides
- Best eSIM for International Travel 2026 (200+ Countries)
- Best eSIM for Europe 2026: 7 providers compared
- Top 7 eSIM Providers for Europe Ranked
- Cheapest eSIM for Europe 2026
- Best eSIM for Short Trips to Europe
- Best eSIM for 30 Days in Europe
eSIM Reviews
- Nomad eSIM Review
- Holafly Review 2026
- Airalo Review 2026
- Saily eSIM Review 2026
- Ubigi Review 2026
- Maya Mobile Review 2026
eSIM by Country
Portugal | Spain | Italy | France | Germany | Greece | Netherlands | UK
Croatia | Turkey | Austria | Switzerland | Czech Republic | Malta